By Timothy Hales | Updated: December 10, 2022
Spatchcocking a turkey is the simple method of removing the backbone and spreading the turkey flat. This allows for more even cooking in a shorter amount of time. It also creates easy carving access to the breasts, legs, thighs, and wings.
How to spatchcock a turkey?
There are two basic steps to spatchcock a turkey. These steps mainly focus on the butchering part of preparing the turkey before cooking.
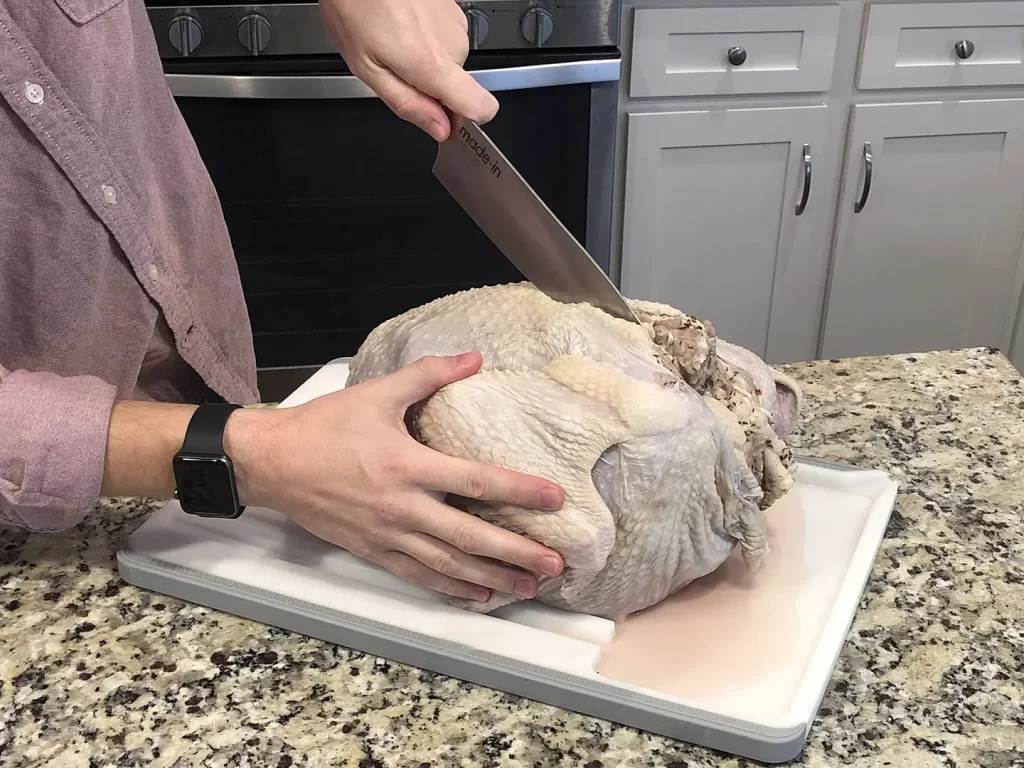
- Remove the backbone: Turn your turkey over to where the breasts are facing down. Find the joint where the neck was removed. Cut on each side of the spine from top to bottom. Do not cut down the spine, as you will be unable to do that with a chef’s knife or poultry sheers.
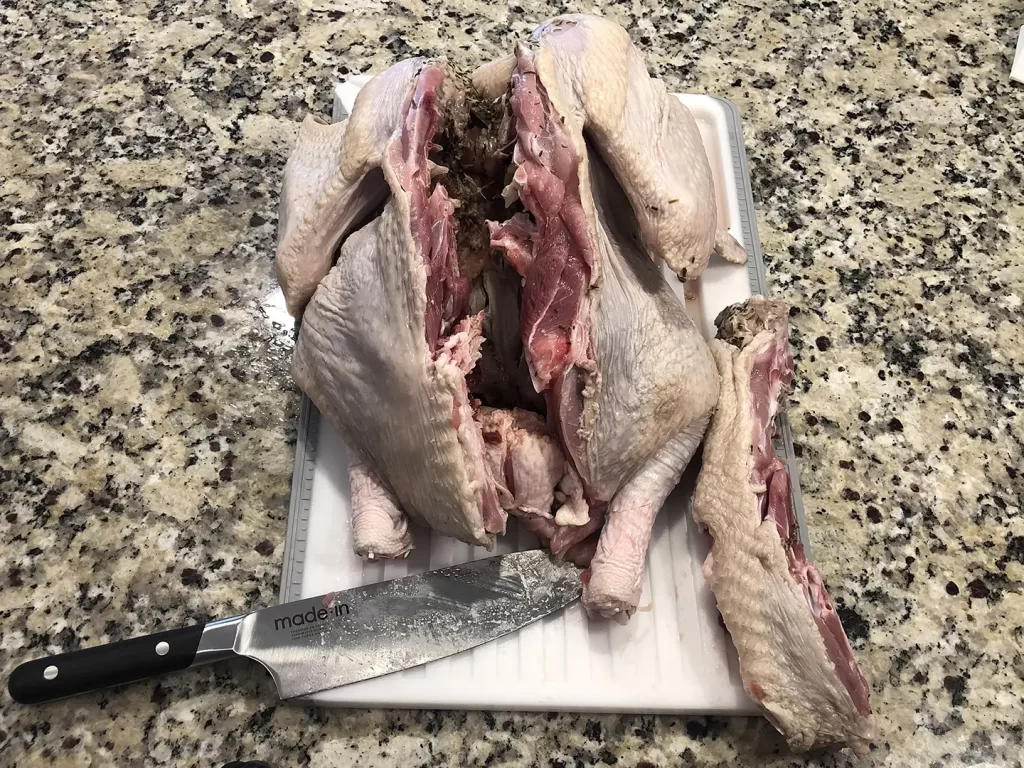
- Break the breastbone: Flip your turkey over with the breast side up. Find the breastbone and firmly press down using the heel of your palm. You should hear the bones crack, and the turkey will lay flat.
Once you have removed the backbone of the turkey and broken the breastbone, you are ready to either place your turkey on the pan or into the brine. You can use a sheet pan with a baking rack underneath. I use the USA Pan Half Sheet Baking Pan with a baking rack which provides enough room for a 15 lbs turkey.
What do you use to spatchcock a turkey?
You will need to have either a pair of poultry shears or a chef’s knife to spatchcock a turkey. Which one you use is purely personal preference or just what you have available in your kitchen. Make sure the tool that you use is sharp enough to cut through the smaller bones along the backbone. I used the 8″ chef’s knife from Made In Cookware for this example.
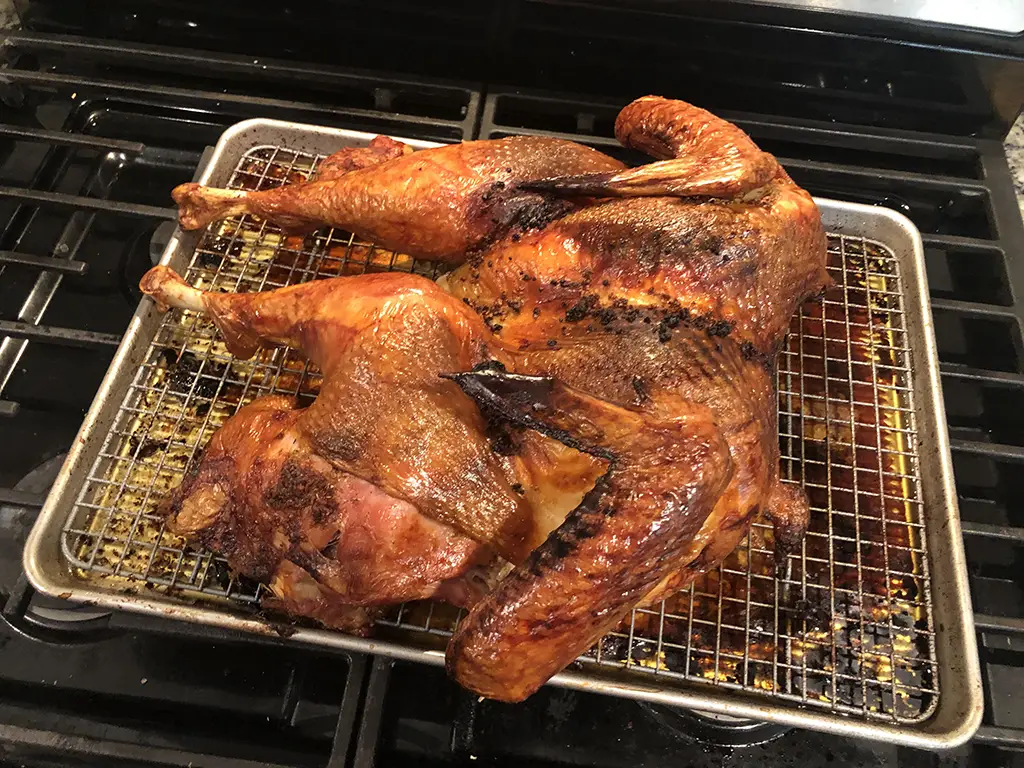
How Long to Cook a Spatchcock Turkey
- Set oven temperature: Set your oven temperature to 350 degrees Fahrenheit.
- Time to cook: Cook your spatchcock turkey at 350 degrees for 10 minutes per pound.
- 10 lbs – 1 hour and 40 minutes
- 11 lbs – 1 hour and 50 minutes
- 12 lbs – 2 hours
- 13 lbs – 2 hours and 10 minutes
- 14 lbs – 2 hours and 20 minutes
- 15 lbs – 2 hours and 30 minutes
- Check internal temperature: Take the turkey’s internal temperature to ensure it has been properly cooked before serving. An instant-read thermometer inserted into the thickest part of the thigh should read 165 degrees Fahrenheit.
Each bird that you cook will be unique, so be sure to check the internal temperate before serving. You may need to adjust your cooking time for your specific bird.
Brine the spatchcocked turkey
You may be wondering if you can brine a spatchcocked turkey. Absolutely, yes! You can brine a turkey either before or after spatchcocking it. I have found it works best to spatchcock the turkey before putting it in the brine, as this saves time on the day that I cook the turkey.
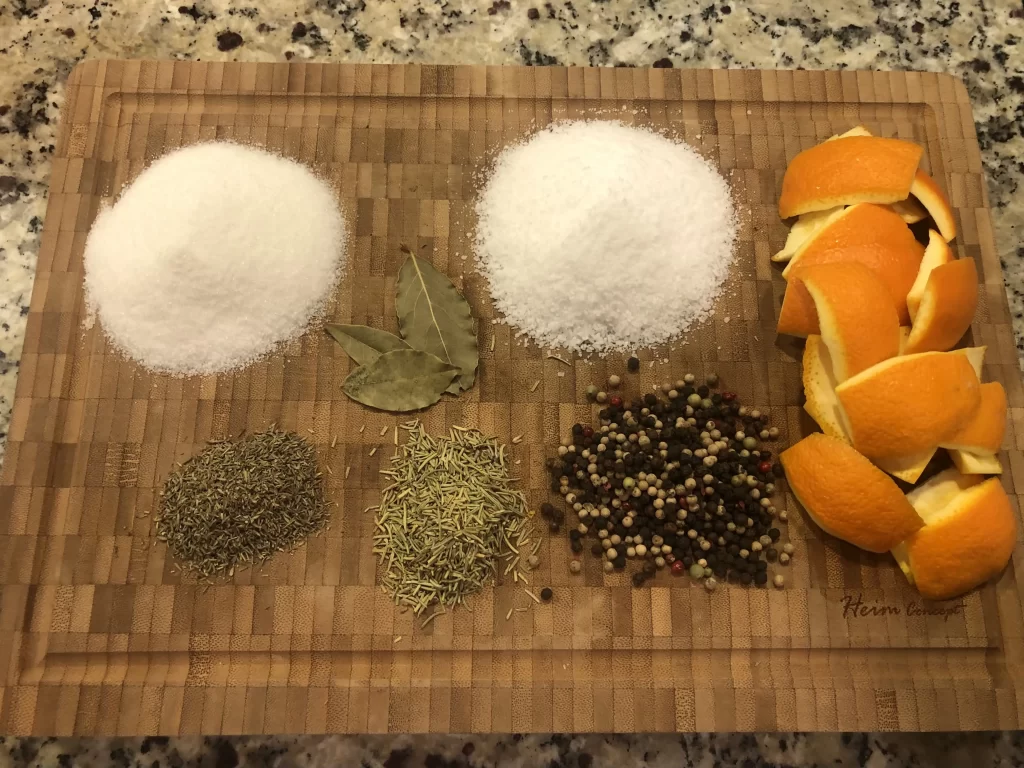
For the last few years, I have used this amazing brine recipe from The Healthy Butcher. I use it as my base recipe and then add a few modifications.
- ½ cup Kosher salt
- ½ cup sugar
- 1 bunch of fresh thyme
- 1 bunch of fresh sage
- 3 tablespoons black peppercorns, coarsely ground
- 2 Bay leaves, torn into pieces
- 1 head of Garlic, cloves separated and peeled
- 2 peels of oranges
- 1.25 gallons of water (approximately 20 cups)
Quick ingredient conversions:
- One fresh bunch of thyme or sage is roughly equivalent to one teaspoon of dried herbs.
- On average, a head of garlic contains 10 to 12 cloves. One clove of garlic equals about ⅛ of a teaspoon of garlic powder or ½ of garlic salt. If you use garlic salt, then be aware that this will add ⅜ teaspoon of salt.
Steps to brine a spatchcocked turkey
- Mix ingredients: Bring 8 cups of water to a boil and stir in ingredients until fully dissolved.
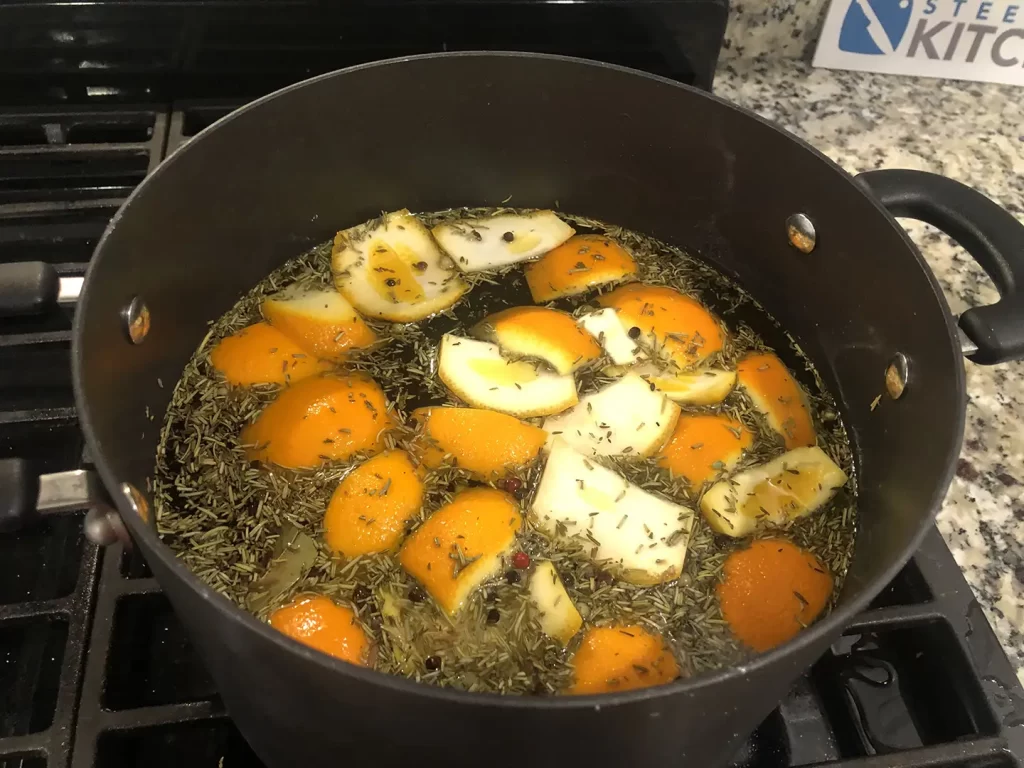
- Let the brine mixture cool: Add 12 cups of water to the brine mixture and chill in the refrigerator.
- Brine the turkey: Place turkey in a bucket, cooler, or large pot and pour over the cooled brine mixture. Let turkey steep overnight for 8 hours in the refrigerator. Do not exceed 24 hours in the mixture for a 20 lbs turkey, as it will cause the turkey to become too salty.
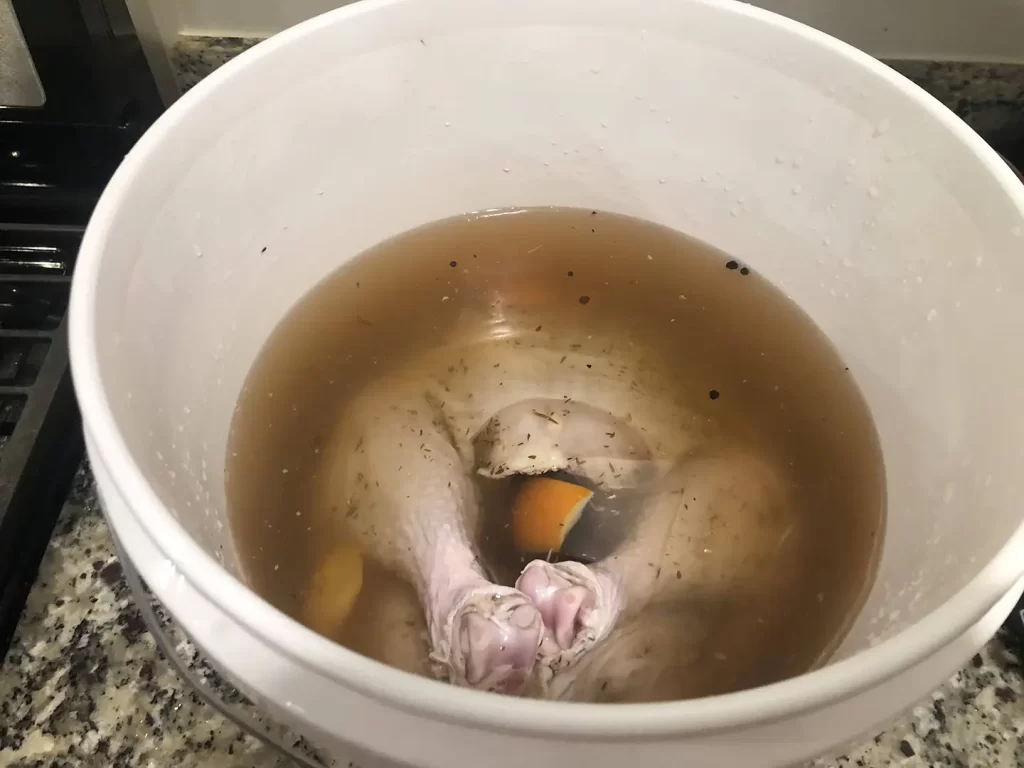
- Remove turkey from brine: Remove the turkey from the brine mixture and rinse with cold water. Use paper towels to pat the turkey dry.
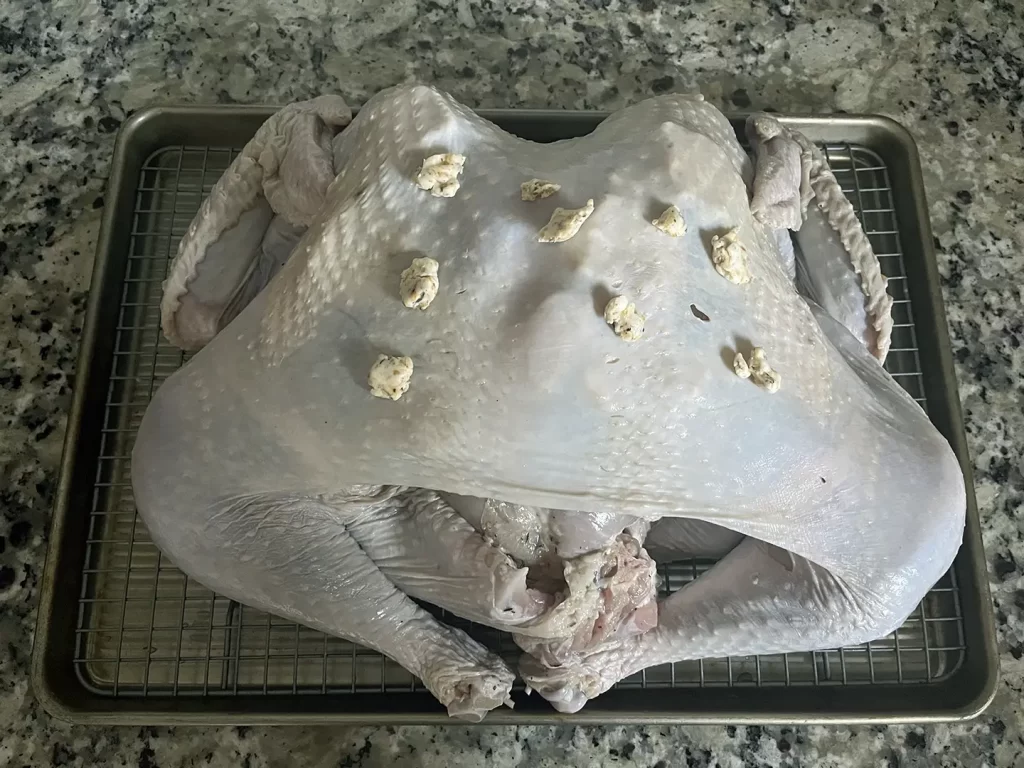
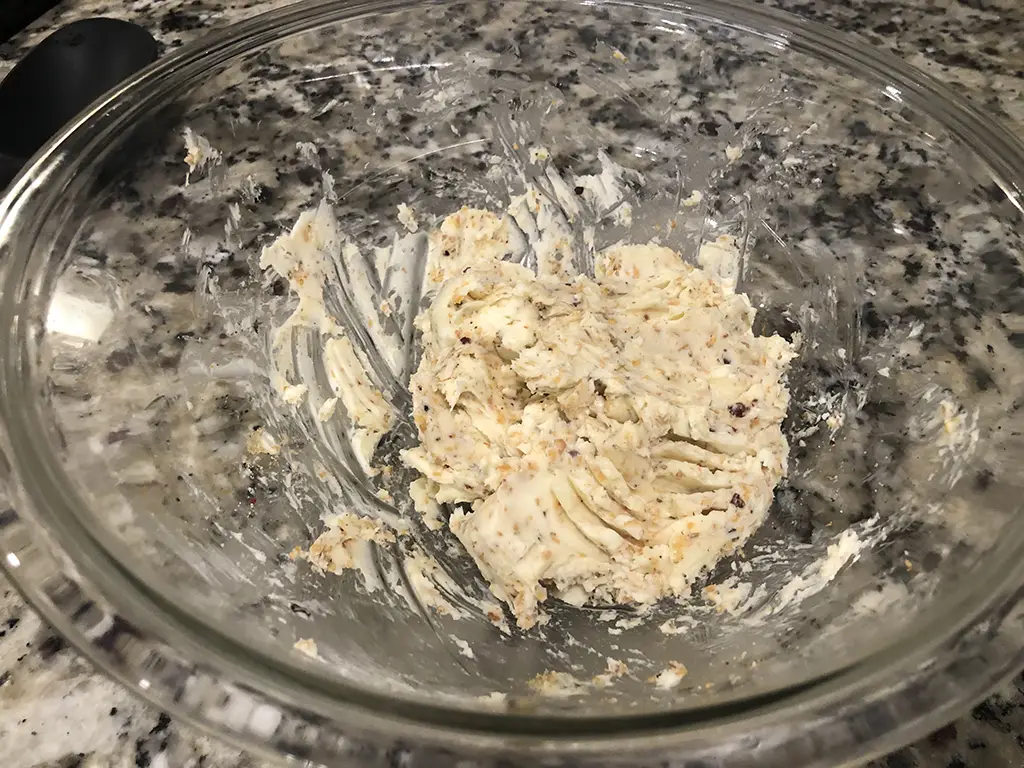
Garlic Herb Butter
Once the turkey has been prepped to be placed in the oven, you can do one more step to make sure your turkey stays moist and flavorful while cooking. That step is to place garlic herb butter under the skin. This allows the additional flavor to be absorbed into the meat and helps crispen the skin. You can also place the button on the outside of the skin. Just make sure you have something to catch any drippings as the butter melts.
Steps to making garlic herb button:
- Soften 2 sticks of butter.
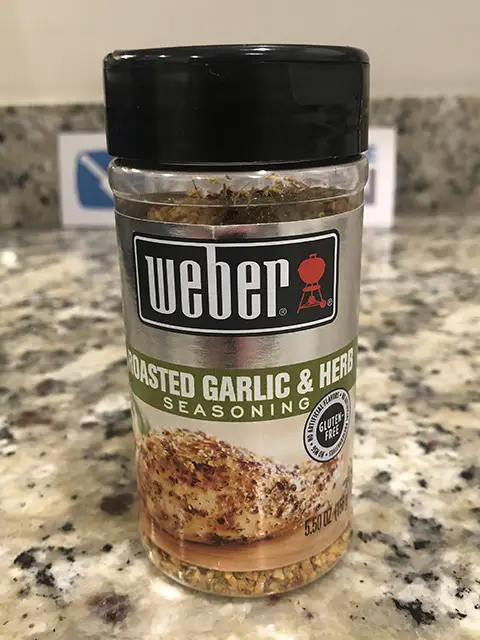
- Add 1 oz. or 3 tbsp. of Weber’s Roaster Garlic Herb seasoning.

- Mix with a fork until blended.
- Wrap butter with plastic wrap and form a log.
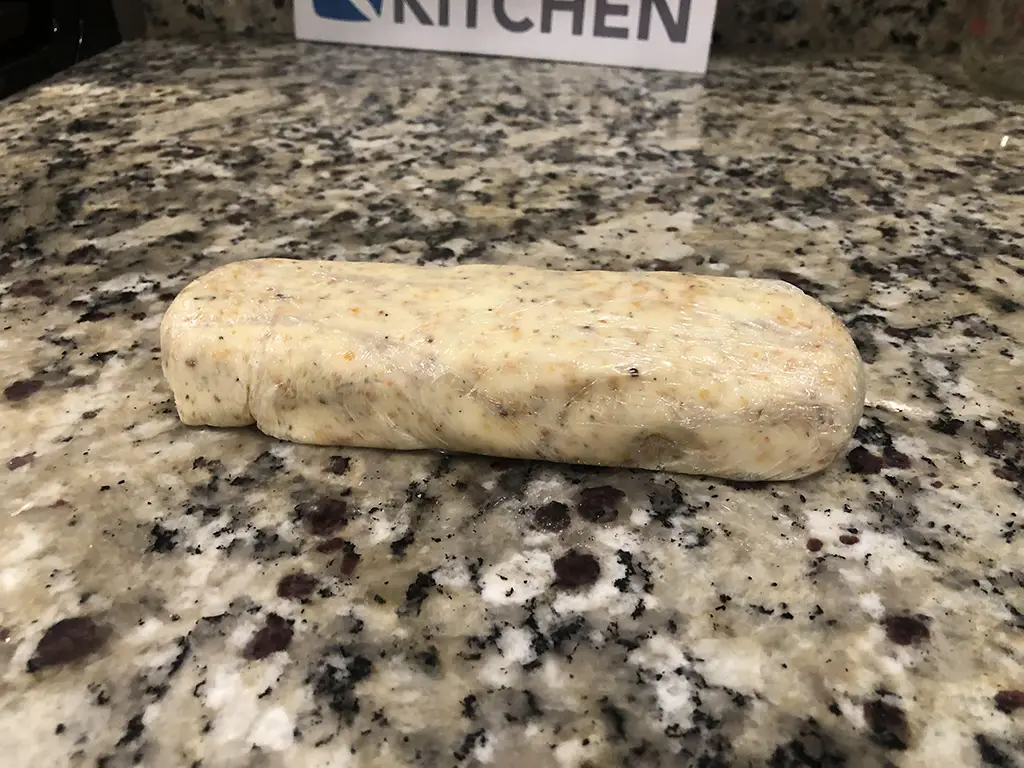
- Refrigerate overnight. It will firm up and be ready to cut up and spread on the turkey.
Summary
If you have always baked a traditional turkey for the holidays, you should consider cooking a spatchcocked turkey. The few extra steps of removing the backbone not only allow the turkey to cook more evenly, but also allow for easy carving.
If you still aren’t sure about spatchcocking your turkey, then you can go to your local butcher and have them spatchcock the turkey for you.
It is also worth the extra effort to brine your bird. Brining will ensure that your turkey does not dry out while cooking and is juicy and tender when served.